

How to machine knit a 1 x 1 ribbing on Brother 260 with a ribber
/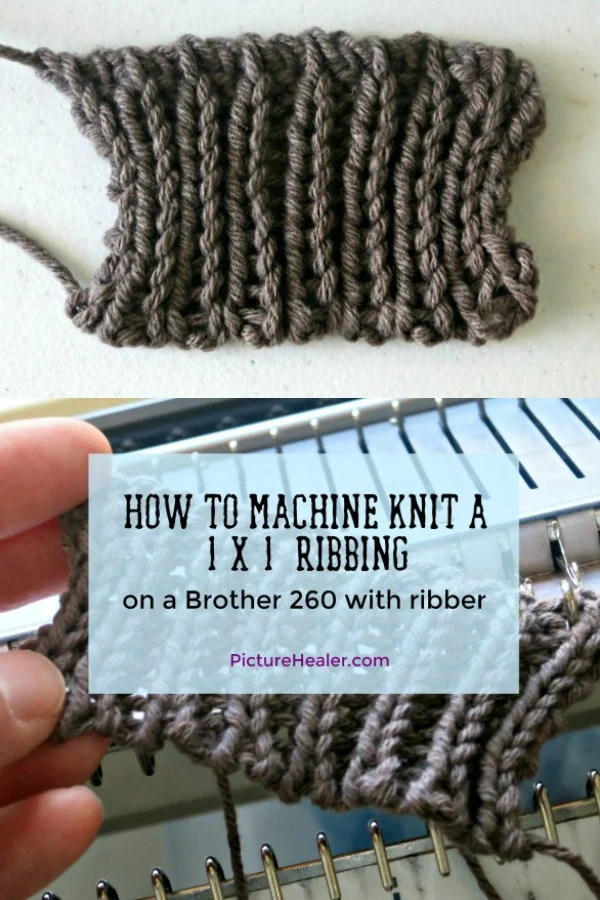
This is a picture tutorial of knitting a basic 1 x 1 ribbing on a Brother home knitting machine. I use Brother KH260 bulky machine (9 mm between needles) with KR260 ribber. It is exactly the same if you have a Brother standard gauge machine (4.5 mm between needles), the resulting piece will be smaller. Adjust your tension and see which swatch you like best. Other brands of machine is similar, but with different dials for the same function. Refer to your manual for all variations.
Sometimes we put away the machine for a while, and we forget how to knit the basic stitches. This is a quick refresher for semi-experienced machine knitters, or for beginners who just start using a ribber. It is not hard if you remember to follow the steps.
Setting up
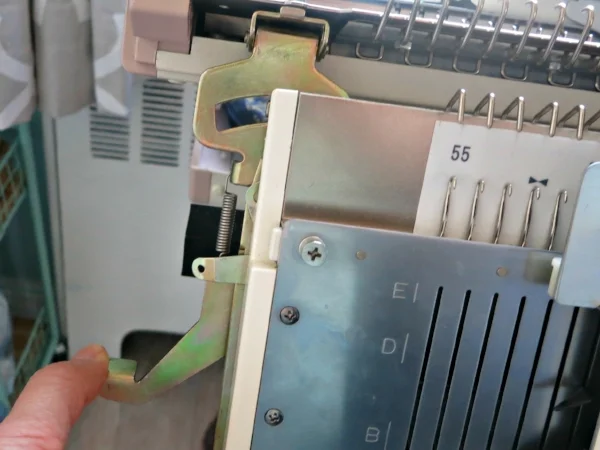
1. Set up the ribber according to your manual. Make sure the connecting arm and ribber carriage are screwed in correctly. The space between knitter and ribber should be small. If the gap is too big or on even in both sides, it won't knit correctly. That can be very frustrating. Your needle pusher should not slide down the gap between knitter and ribber (See picture below). If the gap is too big, it needs to be adjusted first. That will be another post later. Thread the yarn properly and turn the yarn guide to the back (yarn guide in the front when there is knitter only). Refer to the manual if needed.
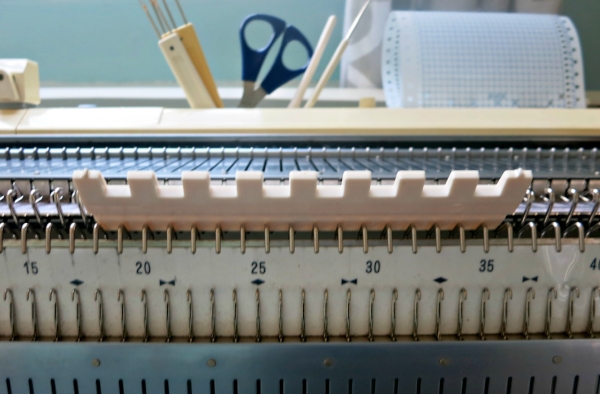
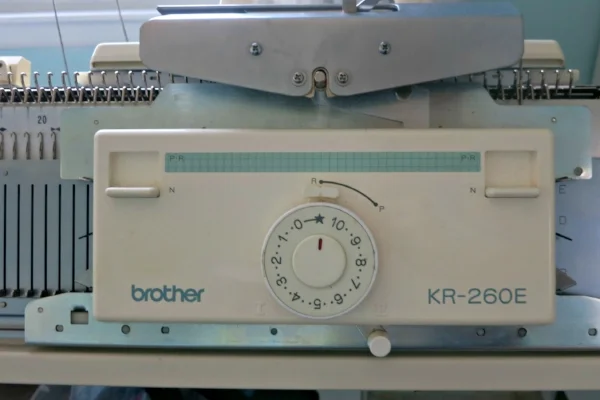
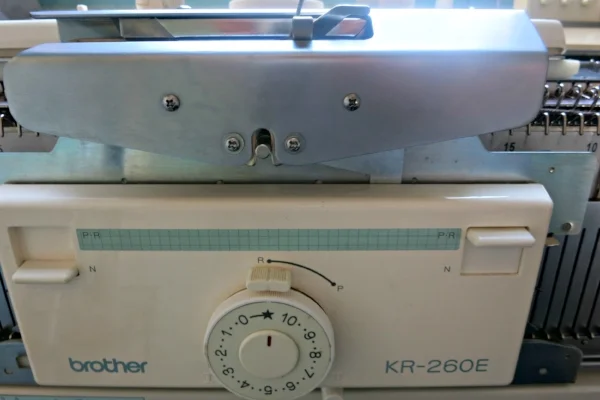
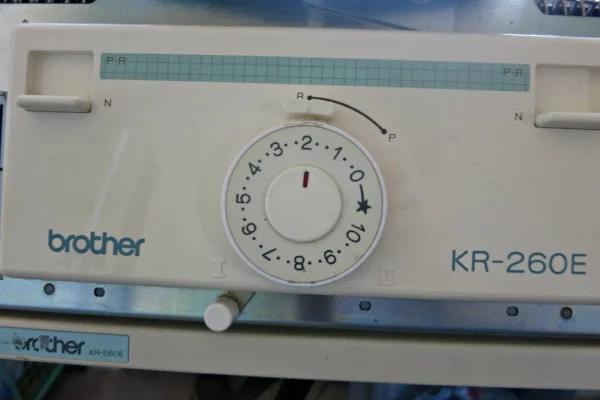
2. Set up the racking indicator to P3 by turning the Grip Handle. See picture below.

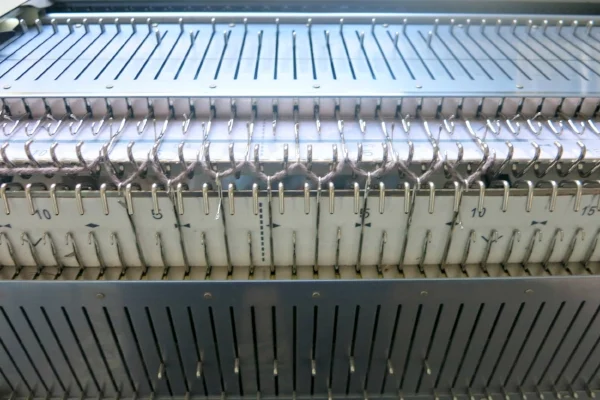
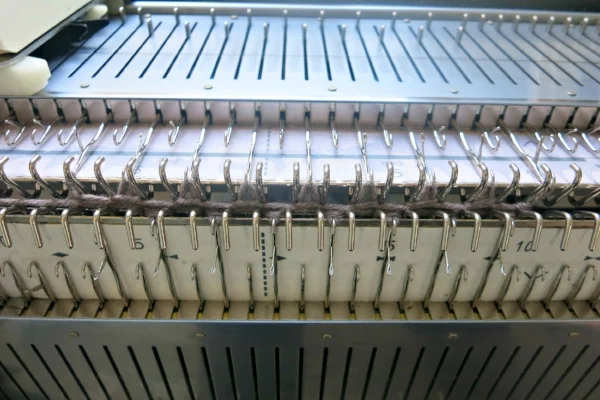
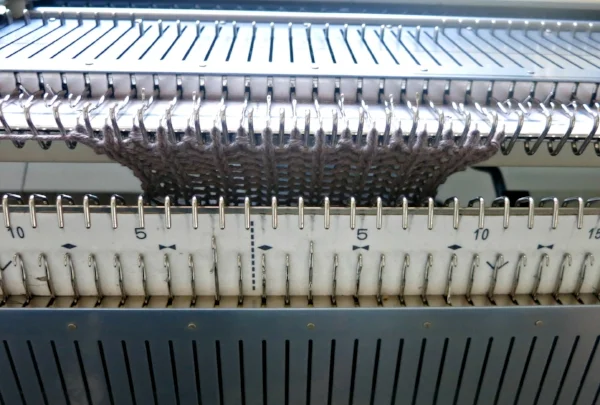
3. Pull out needles of every other one until desired width. Make sure the end needles are both on the knitter. Pull out the needles all the way first. Pass the carriages several time, all needles will return to B position. See picture below.

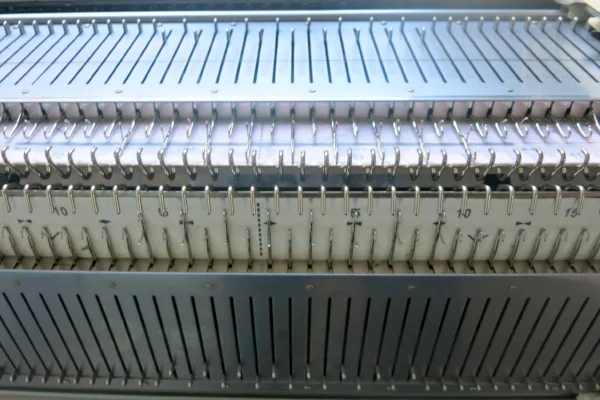
All needles return to B position.
4. Setting up carriage:
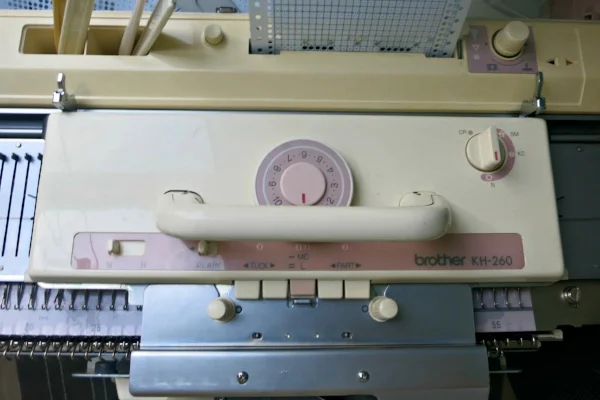
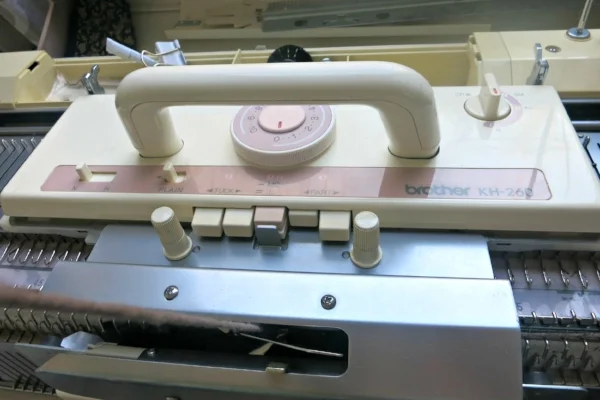
Set up knitter carriage as normal knitting. Tension Dial 0.
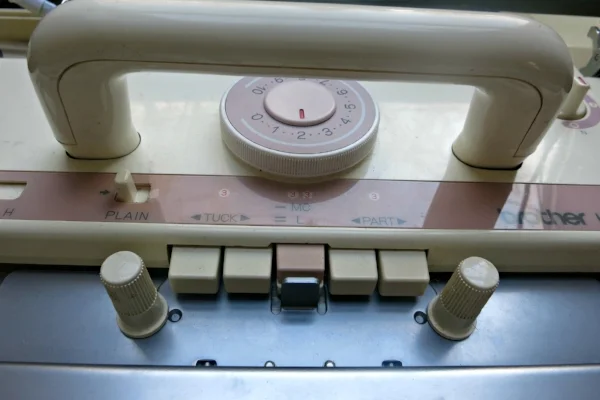
Set up Ribber carriage as normal knitting, Tension Dial to Star or 0. In the bottom, slide lever from I to II (right).
Knit the First Row
Thread the yarn through connecting arm, and add a clip for some weight so it doe not get caught when knitting.
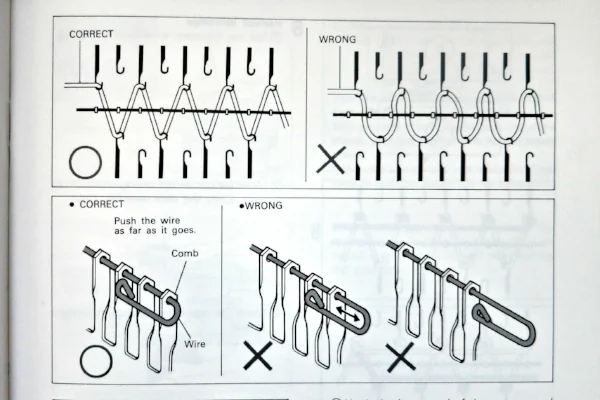
Knit first row by moving carriage to the left. It forms a zig zag row. Adjust the zig zag shape if needed for preparing to put the cast on comb next.
Hang the Cast On Comb and weight.
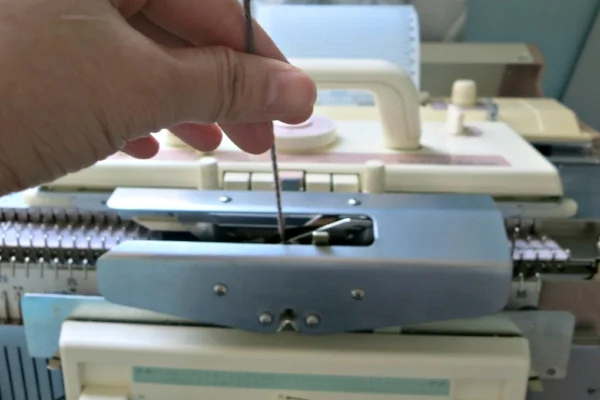
Pull out the wire first, insert the cast on comb in the center of knitting and evenly in the zig zag shape of yarn. Insert the wire back to the comb. Hang proper weight to center of cast on comb. See pictures and diagram below.


Slide in the wire for cast on comb
Perfect Selvage
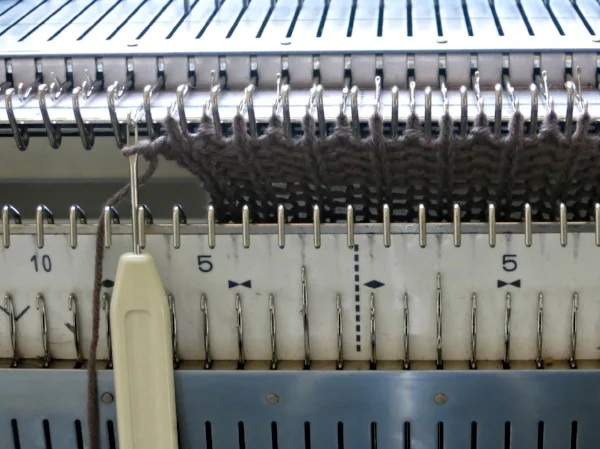
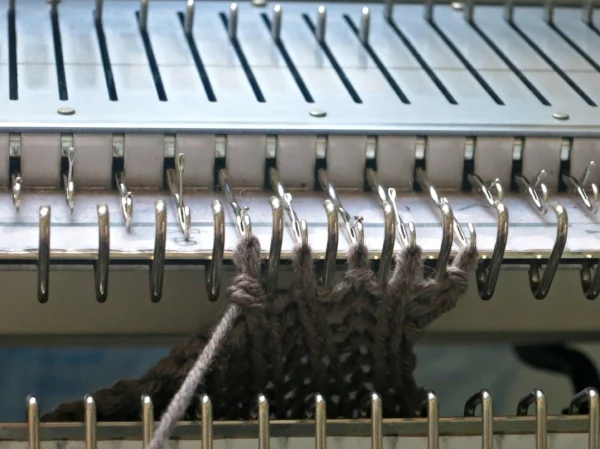
1. Set the knitter carriage to tension 0, and partial knitting (by push the PART button in) on one side. Set ribber carriage to tension 0, and partial knitting on the side opposite to the knitter's partial knitting (by Push up the P.R. button). See pictures below.
Next, knit 2 rows. Now the 3 row of zig-zag cast on is complete. Time to change carriage setting for knitting the main 1 x 1 ribbing.
Setting Main Tension
Setting for knitter carriage: Set to normal knitting (cancel partial knitting button), change Tension Dial to 2 or whatever fits your sample.
Setting for ribber carriage: Set to normal knitting (cancel partial knitting button), change Tension Dial to 2 or matching knitter tension. Slide bottom lever back to I. See pictures below.
Now just continue knitting until desired length.
Transfer Ribber Stitches to Knitter
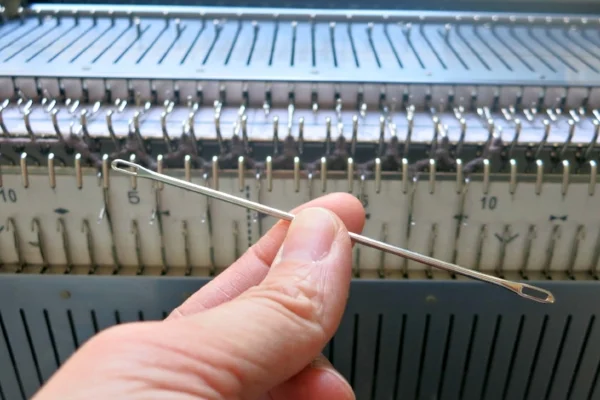
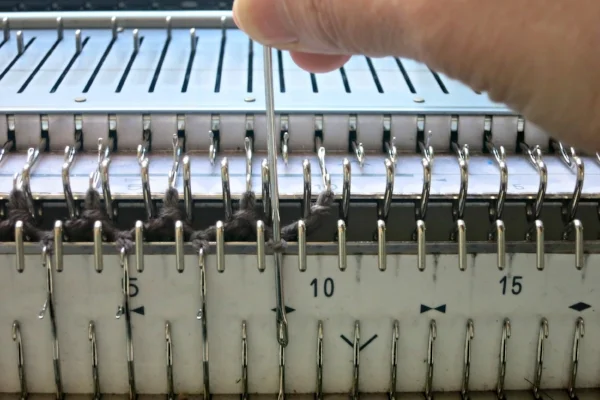
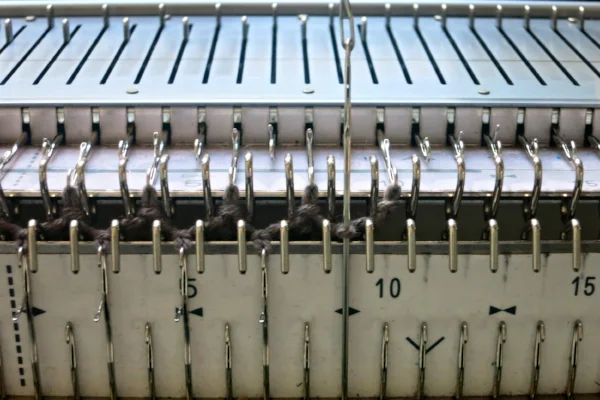
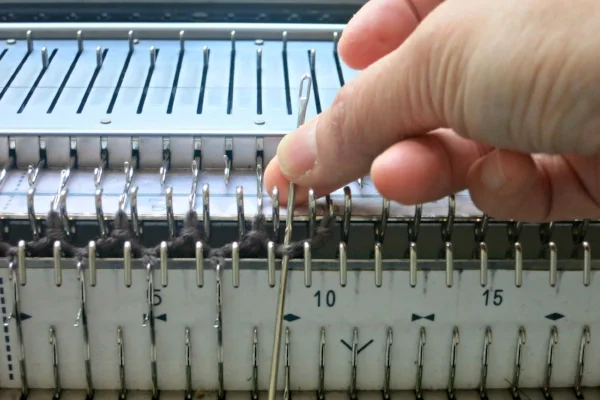
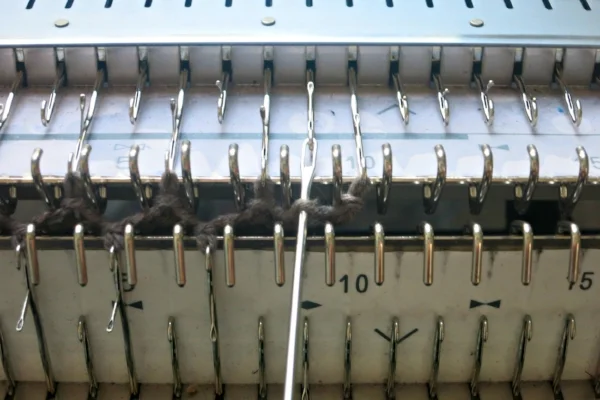
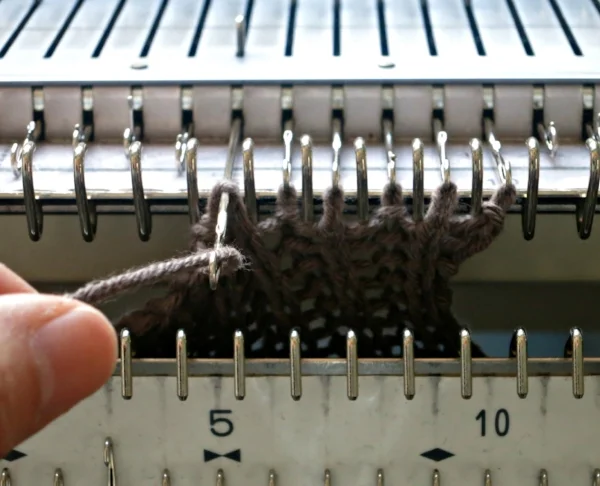
Before binding off, we can transfer all ribber stitches to knitter by using a Double Eye Needle, or one prong transfer tool. Double eye needle works very well for transferring stitches. You can get one from Ebay easily.
To transfer, place one eye of the tool to the hook in the ribber needle, lift all the way up until the yarn pass the latch, and then push down until the stitch is in the middle of the double eye transferring tool. Place the other "eye" over the hook of the empty stitch in the knitter, and slide the stitch to the empty needle. See the pictures below. Repeat with all the ribber stitches.
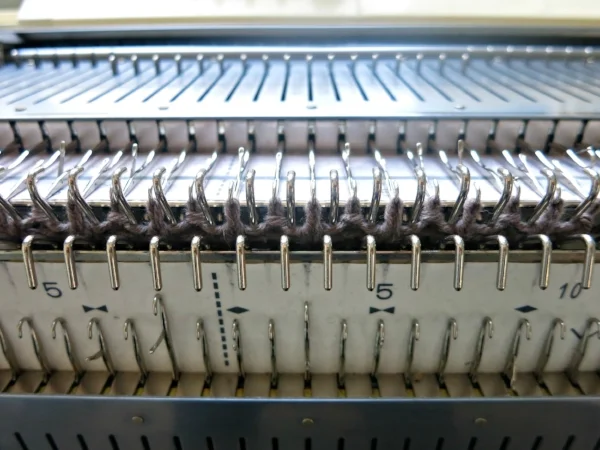
Drop Down Ribber and Bind Off
Now all stitches are in the knitter. Drop the ribber by pushing down levels on both sides, and bind off any way you like. Take off the weight and cast on comb for easier bind off.
Too bind off, I cut off the yarn and leave about 3 times of the width of the sample piece. Use one prong transferring tool, transfer first stitch to the next, pull out the needle so both stitches are behind the latch, wrap the yarn in the hook and pull back the needle to knit one stitch manually. Repeat until the end. See pictures below.
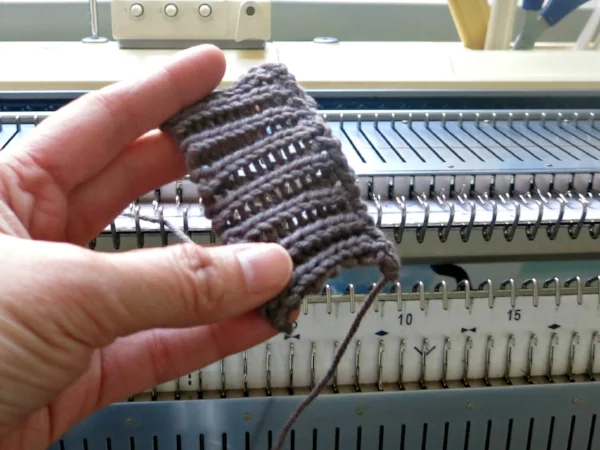
Take the swatch off the knitting machine and all done. You just made a basic ribbing!
Please leave a comment, question, or suggestion below. Love to hear from you.