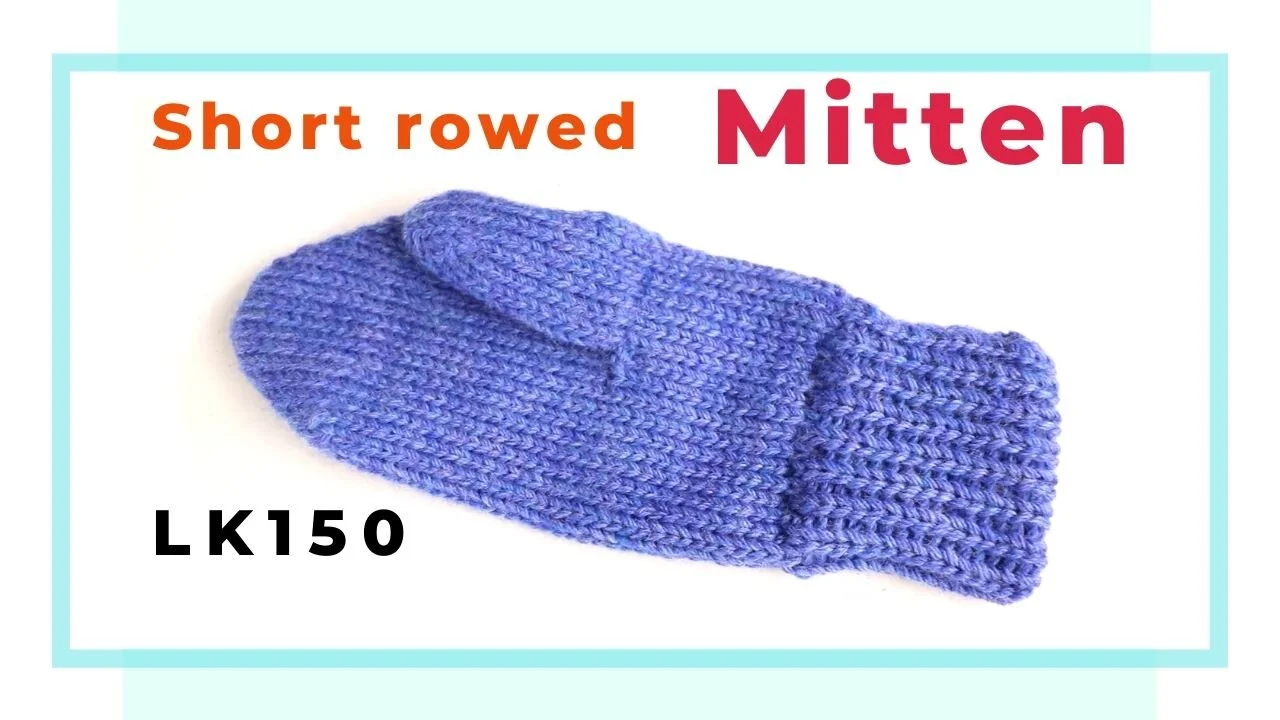

Short-rowed mitten knitted on an LK150 knitting machine
/Short-rowed mitten knitted on an LK150 knitting machine
There are many ways to knit a mitten. Short-rowing is a simple technique on a knitting machine compared to hand-knit short-row. There are also many different constructions of a mitten. Last time, I have a thumb shaping by full fashion increase. Click here for the link. This time, I just make a simple thumb hole.
For this project, I use worsted weight yarn and mock ribbing for the cuff. Mock ribbing is actually pretty stretchy and quick to make.
Watch our video for the short-row mitten tutorial
The set up and Mock ribbing
Use any worsted weight yarn. Set carriage tension to 5.5 for the first part below the thumb hole, and 5 after the thumb hole, and mast tension to 5.
Mock Ribbing
Cast on with every other needle from L18 to R19.
Knit 30 rows.
Pick up the cast on row and hang stitches to the empty needle. Now the mock ribbing is done and we are ready to knit every stitch.
Thumbhole knitting
Knit 15 rows.
On the edge opposite to the carriage, take off the first 8 stitches on waste yarn.
E-wrap the 8 stitches back with waste yarn.
Change to tension 5 on the carriage and knit 20 rows (fewer rows for smaller hands).
Short-row
To prepare the short row, Have the carriage on the opposite side of the thumb hole (add 1 row if needed).
Take off the half of the stitches on the thumb side with waste yarn and a tapestry needle.
Start show row by setting Russell lever to 1.
*Pull out the needle closest to the carriage to the holding position.
Knit 1 row.*
Repeat * until center 1/3 of stitches left (6 stitches)
Reverse short row
*Place the yarn below the first needle close to the carriage side (and next to the center 6 stitches),
Push the needle back until the latch is slightly open.
Knit 1 row.*
Repeat the above * until all needles are back in the working position.
Make sure to use a lot of weight for short-row, or pull down the knitting with one hand.
Cut the yarn leaving a long tail for sewing up seams later.
Knit a few rows of waste yarn and take the project off the machine.
To make the thumb
The easist way is to just make a rectangle and draw up the yarn to close the end. Another way is to do the short-row just like the mitten so it has a nice matching curve.
To knit the short-rowed thumb, I cast on 16 stitches with waste yarn. Set tension to 5.5 and knit 5 rows in main yarn.
Decrease 1 stitch on each side by using a 2 prong transferring tool (full fashioned decrease).
Change tension to 5, and knit 9 more rows.
Start short-rowing
Take off half of the stitches on waste yarn and start short row the rest stitches the same way as the mitten above.
There are only 7 stitches left so the 1/3 will be 2-3-2 stitches. We can short-row until 3 stitches left, and reverse short-row back to 7 stitches.
Knit a few rows of waste yarn and take it off the machine.
Seaming up
We can connect the short-rowed mitten and thumb to the other side (still on waste yarn) by Kitchener stitch.
Sew up the thumb to the thumb hole by Kitchener stitch or 3 needle bind-off.
Sew up side seams of the mitten and thumb by flat Bickford seam or mattress stitch.
Make another one
Now one is done. We need to make another symmetrical one to be a pair.
The actual time on the knitting machine is short, but the sewing up process always takes longer. But once we figure out the stitch and row count for the right size, it is easy to make duplicates in the future. Remember to write down the notes for future reference. Happy knitting!