

Simple fingerless mitten with thumb shaping on an LK150 knitting machine
/Simple fingerless mitten with thumb shaping on an LK150 knitting machine
Fingerless mittens are practical and quick knitting for yourself or giving away. Here I use worsted weight yarn, mock ribbing, hand-knitted thumb ribbing, and one side seam for this fingerless mitten/glove. Because of the shaping of the thumb, it looks fancy but actually easy to make.
See the video below for more detail. You can use a thinner yarn such as a DK weight or sports weight. The cast on number and row count will need to be adjusted. The stitch count for thumb increase will need to be increased to cover the circumference of the thumb.
For the flat seam, you can check out my other video “Part 2 of Women’s socks” HERE.
Watch the video
Basic Pattern
Use any worsted (medium) weight yarn.
Set Tension to 5 on both carriage and mast.
Cast on from Left 17 to Right 16 stitches. Pull out every other needle to the holding position.
Thread the yarn and E-wrap on all selected needles.
Knit 2 rows and hang some weight.
Knit 30 rows (plain knitting).
Hanging the hem (Mock ribbing)
Remove the weight and hang the cast on row back to the empty needles.
Pick up the first knit stitch (first stitch on the right edge) and hang it on the latch of the first empty needle from the right (second needle).
Pick up the 2nd knit stitch and hang on the second empty needle.
Continue to hang all the stitches back to the needles.
Increase the carriage tension by one number (T6) and knit one row.
Chang tension back to 5, knit 10 rows (adjust row number as needed)
Start thumb shaping increase
**On both sides, move out one stitch by transferring the outer most 9 stitches using a 3-prong transferring tool.
The 10th needle will be empty. Pick up the purl bump from the first V (stitch) of the 11th stitch and hang it to the empty needle.
Knit 2 rows (you can pull out all stitches to the holding position for easier knitting)**
Repeat from ** to ** so there is a total of 6 increase. (6 stitches on each side)
Take off thumb stitches
Cut a piece of waste yarn and use a large eye needle to thread through the outer 6 stitches on both sides. Take these stitches off the machine.
Place these 6 (each side) empty needles back to the non-working position.
Hang weight to these thumb stitches to avoid tangling.
Leave a yarn tail (for seaming later) and cut the yarn.
Reattach the yarn for knitting the center part.
Knitting the center
Knit 5 to 10 rows (depending on the hand size).
Start Mock Ribbing
Transfer the needles so there are 2 stitches on every other needle.
Push back the empty needles (every other needle) to the non-working position.
Knit 15 to 20 rows (depending on the hand size)
Take off waste yarn
Cut off the yarn leaving a long tail for sewing up the mock ribbing.
Change to waste yarn and knit a few rows.
Take the knitting off the machine.
Sew the side seam using a flat Bickford seam or mattress stitch.
Pick up thumb stitches (12 stitches total), and add extra 2 -4 stitches around the joint with a circular needle.
Attach yarn and start knitting 1 x 1 ribbing (K1, P1).
If the leg of the V is not in the right position, switch in the first round so the right leg of the stitch is in the front. Then continue knitting for about 6 rows.
Bind off using “the sewn bind off”: cut a piece of yarn, thread the yarn needle, sew 2 stitches forward (back to front) and 1 stitch back (front to back), then take 1 stitch off the needle. Continue for the whole round.
Seaming the side
Use a yarn needle to sew up the side seam. You can use a Mattress stitch or flat Bickford seam (See the LINK HERE). Starting from the inner flaps of the mock ribbing, then continue to the outer part all the way to the thumb hole.
Weaving the yarn ends. If there is any hole on the base of the thumb, close the hole by weaving the yarn end. Done!
Now it’s time to make the other matching fingerless mitten!


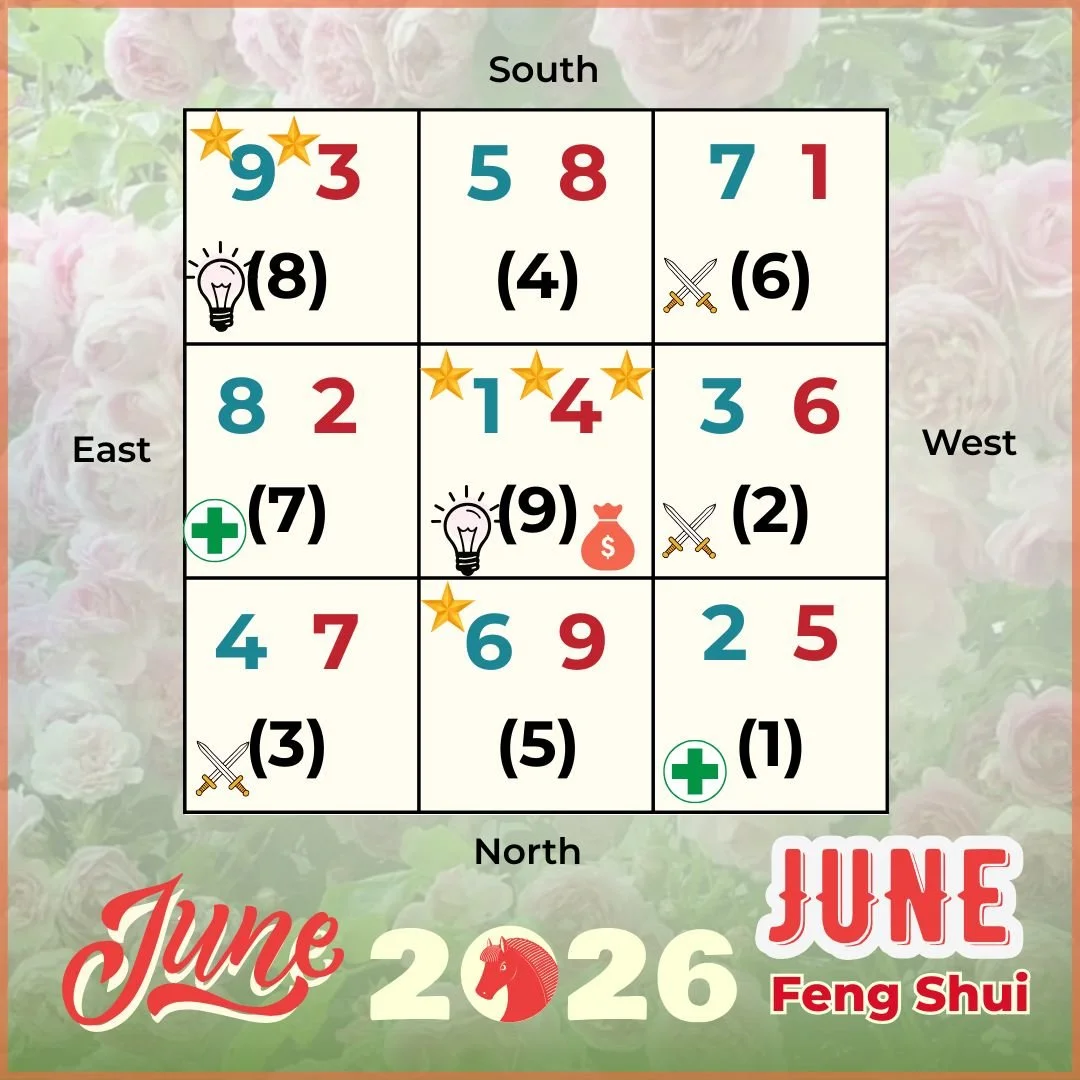
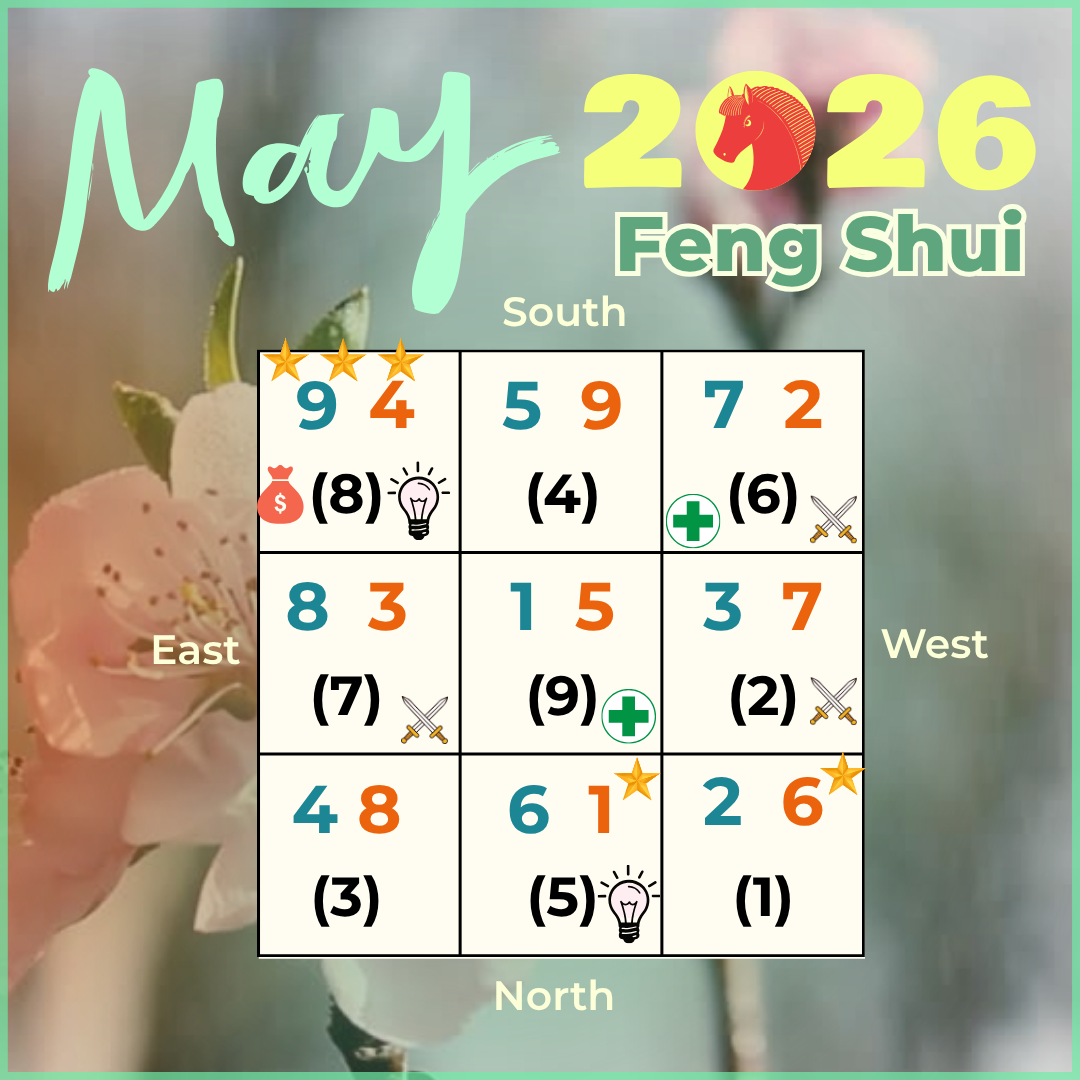
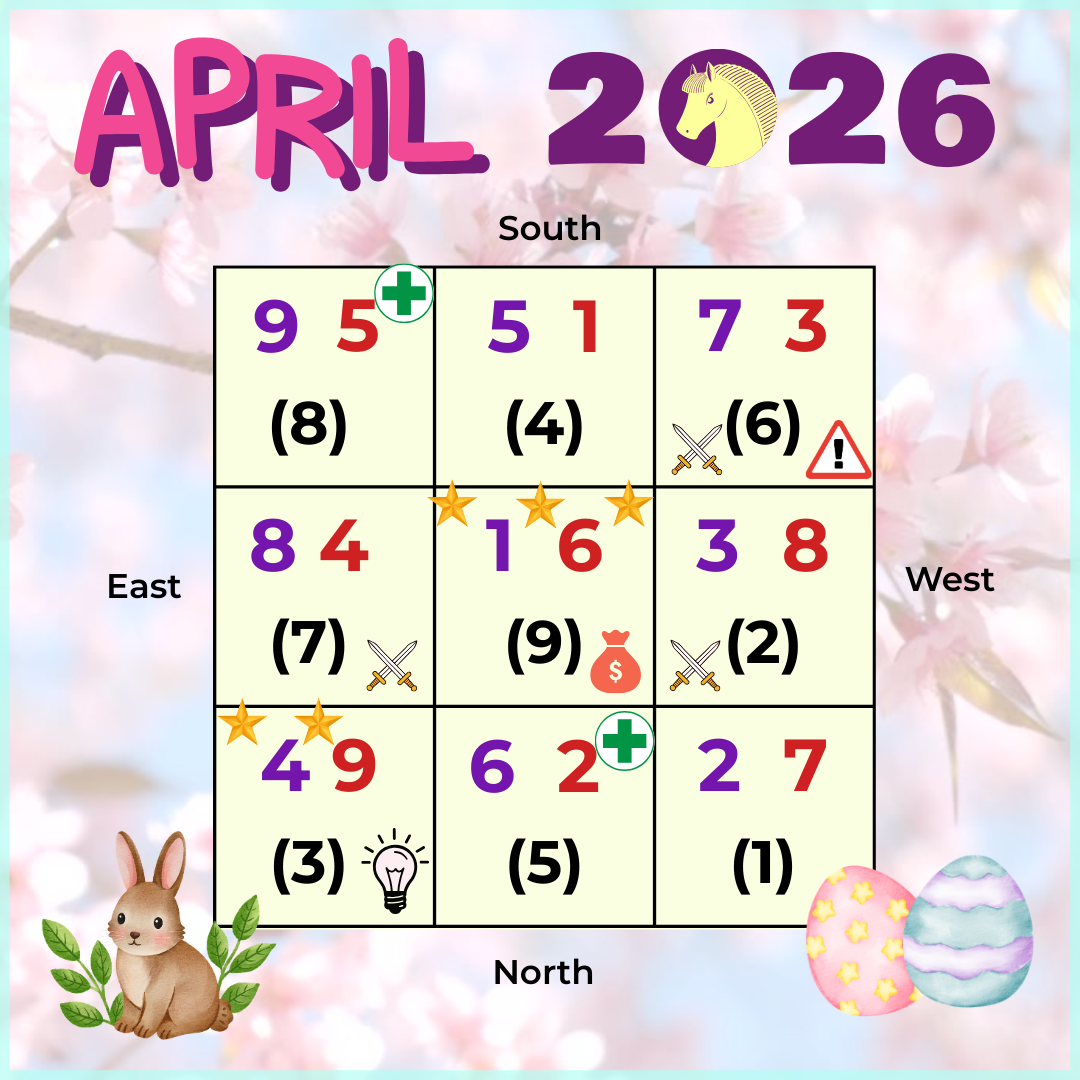
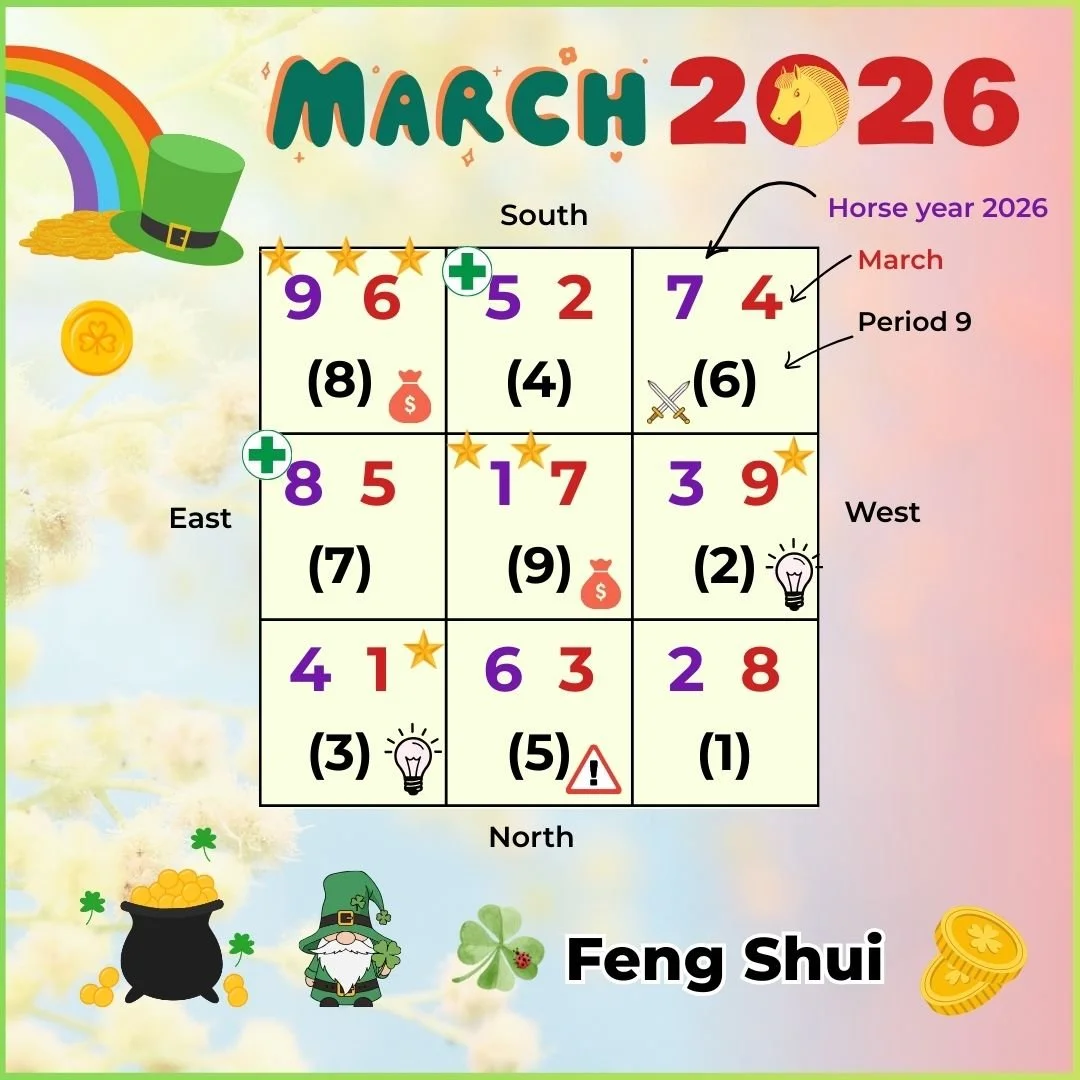


July is the fire Goat month, similar to the fire Horse month of June, with a lot of tension and drama. In July, the best direction is East; pay closer attention to the West and South for diseases and conflicts.